
Tips for the novice mountain biker - part 2

As you start out on your mountain bike journey there will be the inevitable ups and downs. There will be lots of laughs and smiles, a few tears and the inevitable falls.
As well as having an understanding as to how your bike works and what equipment you should carry to get you out of any emergency situations, it’s also important that you develop a good understanding of the techniques and skills to help you safely negotiate the terrain that you are riding on.
As your bike handling skills improve not only will it enhance your own safety, but it should also result in a smoother and more flowing ride. Which more often than not leads to a more enjoyable time spent in the saddle.
In part one of this series of posts I discussed the main components that make up your bike, and briefly delved into the clothing and equipment that you should probably own. In this edition I write about the essential techniques that you should aim to master to make the most of your time out riding.
Firstly for the point of the post it’s important that you understand the difference between technique and skill, as they are often used interchangeably, but they do mean entirely different things.
Technique is how an action or movement is performed, such as braking, where as a skill is the application of the appropriate technique at the right time and in the right place, such as when to brake for a corner.
Essentially there are a number of techniques and skills required in Mountain Biking. These include, but are not limited to:
The ready position
Balance, co-ordination and anticipation
Compressing and releasing
Braking
Cornering
Climbing
Descending
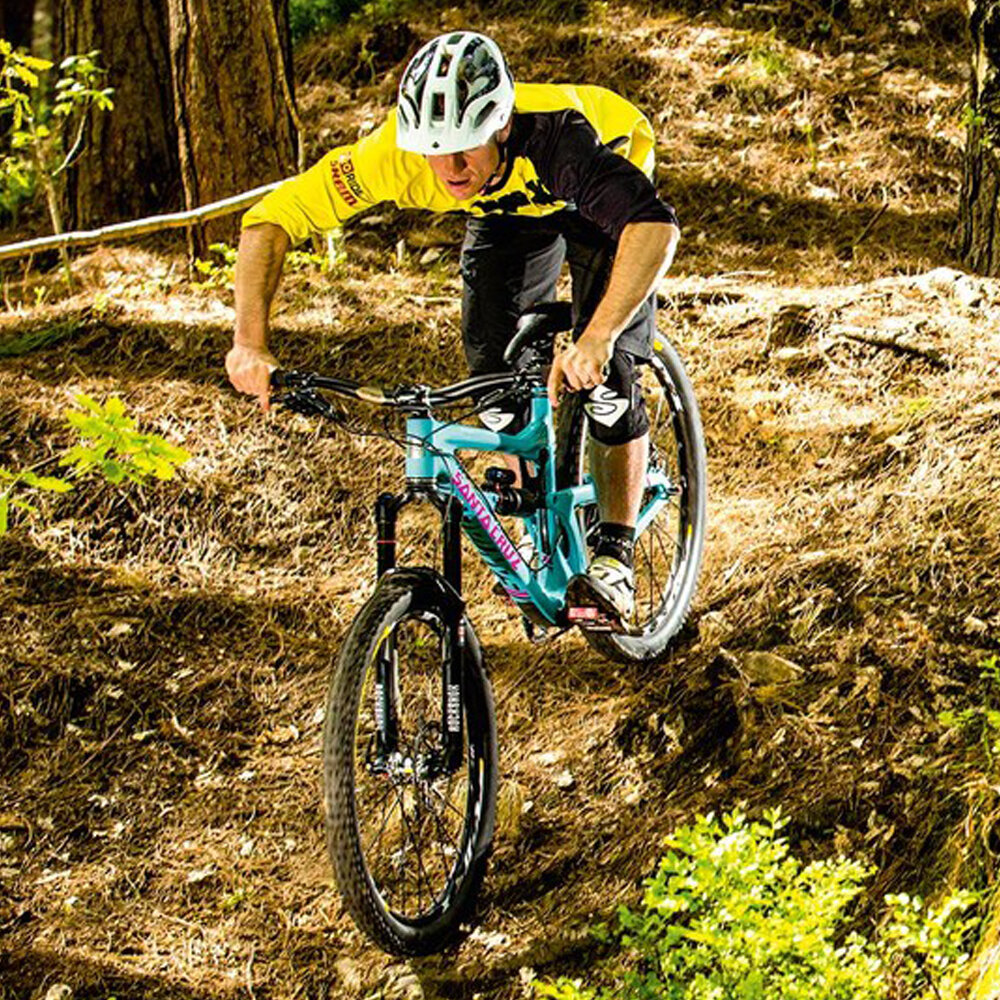
The Ready Position
This is the riding position that offers the most stability and control over your bike. It’s especially important when entering some unknown or technical sections of terrain. Here are some tips to help you adopt the ‘ready position’.
Keep your cranks positioned horizontally with your heels down
Look ahead at where you want to go
When on flat ground position your weight over the centre of the bike i.e above the bottom bracket
Stay relaxed with your arms with legs slightly bent
Cover your brakes with one finger

Think of the ‘ready position’ as your default riding position when on a bike. It’s the start position for many other techniques and skills, and with practice you it will soon become natural for you to assume this position without you even thinking about it.
Balance, co-ordination and anticipation
Balance is clearly crucial in your ability to ride a bike. It’s affected by a number of factors such as the terrain, gradient, angle of the bend and even your own agility.

A key factor in your ability to maintain balance is to not only know the power of your brakes and to keep your weight on the pedals, but also that you use all points of contact with the bike to be able to move around it. This obviously requires a degree of coordination.
Coordination requires different parts of your body to work together with each other in an efficient manner, an example is holding a track-stand.
Anticipation is required for all techniques on the bike. You need to be able to anticipate the trail ahead. If you can address your body position, gear selection, and line in advance of any change in terrain or obstacle, it will enhance your safety and confidence, and lead to a more enjoyable ride. The key here is to always look ahead down the trail. The only way you can anticipate the trail ahead is by looking at. If you are always looking at your front wheel you won’t be leaving yourself enough time to react to any hazards and terrain changes.
Compressing and releasing
Being able to shift your weight around your bike means that the bike moves underneath you, which in turn will give you more control. Compressing enables you to regulate the bike’s movement for more precision regardless of how fast you’re going, especially useful when hitting those fun descents., where as releasing is the opposite of compression and lightens up the entire bike, which is beneficial for hitting the berms and corners.
Compressing and releasing essentially allows you to keep your weight centred over the bike despite the change of gradient, terrain and therefore angle of your bike. You effectively move your weight around in conjunction with the undulations of the terrain so you don’t lose balance.
Approach any change in terrain in the ready position, with your head up and looking ahead at where you want to go
Use your arms and legs to adjust the bike position according to the terrain
Always try to stay relaxed with your cranks horizontal
As the ground rises allow the handlebars to move towards you by crouching down at the waist and pulling off the handlebars whilst simultaneously pushing down on the pedals
As the ground falls allow the handlebars to move away from you by pushing off the bike in a vertical motion. The angle between your torso and arms should increase
As you reach level ground return to the ready position
Braking
Learning how to cover your brakes and use them effectively is without question the most important safety technique when it comes to having full control of your bike.

Covering the brakes ensures that you are ready and able to slow down for any eventuality or emergency that arises. This is done by extending your index finger over the end of the brake lever. Depending on how powerful your brakes are will depend on whether you need to use your middle finger as well. In reality your brakes should be covered at all times.
Just as important as covering the brake is knowing how to use them effectively.
The front brake will provide most of your braking power whilst your rear brake assists and provides stability. This doesn’t mean you should just slam on the front brake, or squeeze the lever harder, it just means that the front brake provides most of the braking for a similar pressure. On most modern mountain bikes that run disc brakes you will notice that the front rotor is likely bigger than the rear one. This assists with your braking performance.
In most situations you want to simultaneously use both brakes with not too much force. You want to modulate the force applied to your brake levers, especially to the rear brake. As much fun as skidding is, a skidding wheel is not braking effectively, and it can also cause damage to the trail you are riding. Modulating the force you use will also help you to avoid locking wheels and dragging the brakes.
Aiming to anticipate the trail ahead and adjust your speed accordingly is key to maintaining overall control of your bike.
Use the front brake for slowing down and the rear brake to adjust your braking speed and pace regulation.
You can also shift your weight around the bike to help with braking performance. This is done by dropping your wrist and heels and pushing your bike forwards slightly to counteract the forces of your braking pulling you forward.
Cornering
Cornering is another important technique that you need to reduce the chances of falling or sliding out. Every corner you come across is different but they will generally either be flat or bermed (banked corner).
Regardless of the type of corner, to get round it safely you want to ensure that you brake before it so you are entering it at a speed you can control, and as with all mountain bike techniques you want to make sure you are looking ahead at where you want to go. This will mean in most cases looking round the corner and spotting your exit.

There are however some additional techniques to implement depending on the type of corner.
For instance on a flat corner you want to enter wide, aim for the apex, and exit wide. Think about leaning your bike into the bend so the edge knobs on your tyres grip the terrain. This is done by applying sideways pressure to the handlebar and angling your hips and shoulders into the bend, just make sure that the outside pedal is down and you are applying pressure to it.
On berms you want to try to take a consistent line all the way round the corner and lean the bike towards the centre of the berm. The angle of yourself and your bike should be same, essentially you are using the berm itself to maintain grip with the tyres. Because of the greater angle of the bike, you need to make sure that the cranks are horizontal with the outside pedal forward, and ensure that you are applying downward pressure to that outside pedal.
Climbing
Hills are an inevitable obstacle to overcome in the mountain biking environment so it’s essential that you develop and hone your ability to climb. Predominately there are two types of climbs; the longer climbs where it helps to zone out, and the shorter, punchier climbs where you need to find your inner power unit.

To improve your skills at climbing there are a number of factors you should consider.
Select a suitable gear on your approach to the climb. Depending on the terrain if your gear is too easy you will likely spin out and lose all traction, and if it is too hard the chances are you won’t be able to apply enough power to the pedals
Select a cadence that you can maintain for the length of the climb
Aim for a smooth pedalling action and maintain a steady cadence to maximise traction
Adjust your position in the saddle to suit the gradient. If the hill is particularly steep lean forward into the handlebars and slide forward toward the edge of your saddle, this will distribute some weight onto the front wheel which will stop it popping up
Drop your wrists, and if needed, position your thumbs on top of the handlebars to help you relax the upper body and to stop you from pulling on the handlebars
Keep your head up and look at the trail ahead to pick the best line
If you need to change gear on a steep gradient lighten your pedal stroke for a smoother change
If you are riding in a group leave enough of a gap so if someone in front of you stops they won’t impede your progress
Descending
Riding downhill is another integral part of mountain biking, and being able to descend safely and in control of your bike at all times, especially on the steeper more technical descents, is of paramount importance. Riding downhill tends to be where mistakes can happen, and sometimes with disastrous consequences, so it’s always prudent to take extra care and not be too ambitious. Safety and enjoyment work hand in hand on descents.
Always set up for a descent in the ‘ready’ position
Drop into the descent in a higher gear and decrease pedalling, or stop pedalling altogether and rely on momentum to carry speed
Modulate your braking, as discussed above, and apply both brakes effectively. Avoid skidding
Try to stay relaxed and loose, with slightly bent elbows and knees to allow your joints to act like an extra suspension
Drop your wrists and heels to help push the bike through the impacts. Make sure that the cranks are horizontal
Shift you hips back slightly and push the handlebars forward. Your range of motion will depend on the steepness of the descent
Lower your chest and aim to get your chin over the stem as it ensures your weight remains balanced so you don’t unweight the front wheel
Maintain balance by moving around your bike. If you move your body in the right direction the bike should respond accordingly
As with all techniques keep your head up and look ahead down the trail so you can pick the best line
Riding in mother natures playground can, and will, often throw up unsuspected changes in terrain. I always recommend for the novice mountain biker that it’s a good idea to ride at one of the many trail centres that are located all throughout the UK, alongside riding out in the wild. Trail centres are great for practicing techniques, and many have skill parks where you can really hone your skill set. The graded routes at trail centres are usually always clearly way-marked as well, so the ability to be able to read a map is negated. For the novice mountain biker trail centres can provide an exhilarating introduction to the world of mountain biking so they are well worth a visit.
A fluid and dynamic mountain bike ride goes far beyond point and go. Understanding how body movements and technique can work in your favour will not only enhance your enjoyment, but also just as importantly, your safety.
Now go ride, and remember to be nice and say hi!